Tuesday, May 22, 2007

Creating delicate features in CB Model Pro


When sending a model to be printed in 3D, it's wise to reduce the volume of the model. As I was experimenting with techniques to do this, I found that I could create much more delicate models than I had previously thought in CB Model Pro.

In the first video, I demonstrate some techniques for reducing volume of the object and also demonstrate just how delicately the CB Model Pro engine can work. As usual, it's a demo and I'm pressed to complete it as quickly as possible, so you should be able to do a much better job by taking more time. This one is probably too thin to safely print in 3D. But, it does demonstrate the concept.

Play the Finer Work Demonstration

Preparing an object for 3D printing usually starts by exporting it. Most of the 3D printers can use an STL file format. Here is what our model looks like when exported in the STL file format.

Play the STL Reader Demonstration

The ability to export our models in various file formats is a wonderful capability that permits us to use our models in a variety of ways, from animations to actual 3D hard objects. Nice.

Thursday, May 17, 2007

It's coming! 3D Printing for 3D fans

I've been drooling over the concept of 3D printing for some time now. But, had never actually seen the output. I recently learned that there was service bureau near my home that had a 3D printer so I decided to stop by and see if they had any samples.

They did. And, very impressive ones at that! I'm sold.

But, being sold doesn't mean that I can afford one just now. Z-Corp's Z-450 is around $40,000 which puts it a well beyond my budget. But, there is hope.

Cornell's Fab@home Project is a low-cost experimental 3D fabricator. While it relies on extrusion to create 3D items, it still looks fun. But, I'd really like something closer to what the big guys have.

That's where the V-Flash and Desktop Factory come in. They claim to be releasing lower cost 3D printing solutions sometime this summer. The V-Flash will be introduced at $9,900 and the Desktop Factory is projected to be $5,000. While not cheap, these prices represent a significant breakthrough.

From what little I've been able to learn, the V-Flash printer seems to produce the higher resolution while the Desktop Factory is certainly the most affordable. The V-Flash is from a well established 3D fabricator manufacturer and the samples seem to have a much finer surface than those seen on the Desktop Factory web site. I came across a discussion that included some remarks from someone that had seen the V-Flash in action. I haven't verified that the information is completely accurate; but, it appears that it is. Here is a link:

http://rapid.lpt.fi/rp-ml-current/0244.html

The company building the Desktop Factory claims that their aim is to get the price down to around a $1,000 in four years. If and when this happens, and I have no doubt that SOMEONE will, it's going to revolutionize many things that we can't even comprehend just now. Education and art are definitely going to be impacted in a huge way.

It's coming and the prices are coming in our direction!

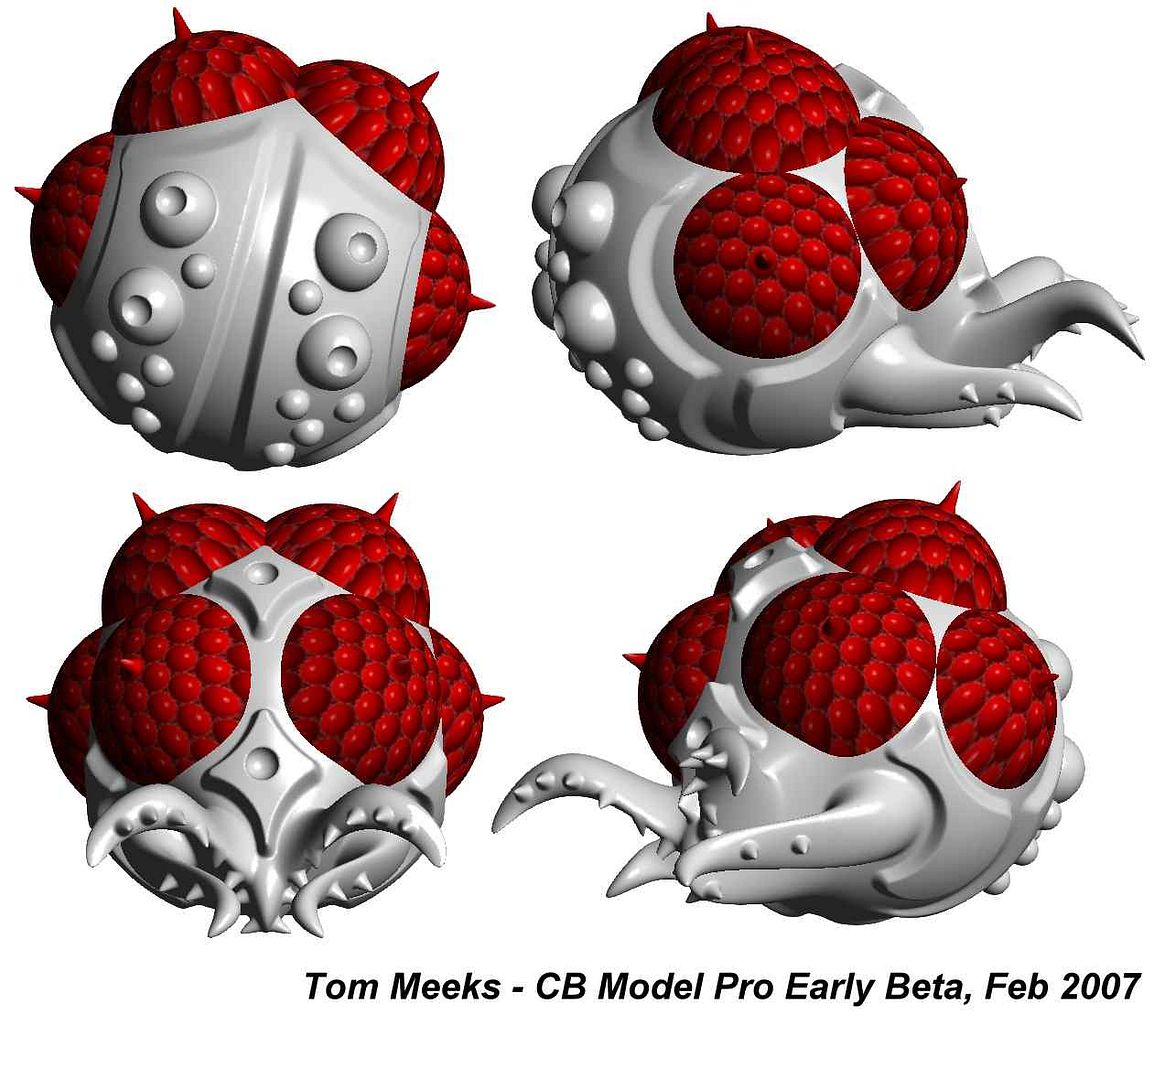
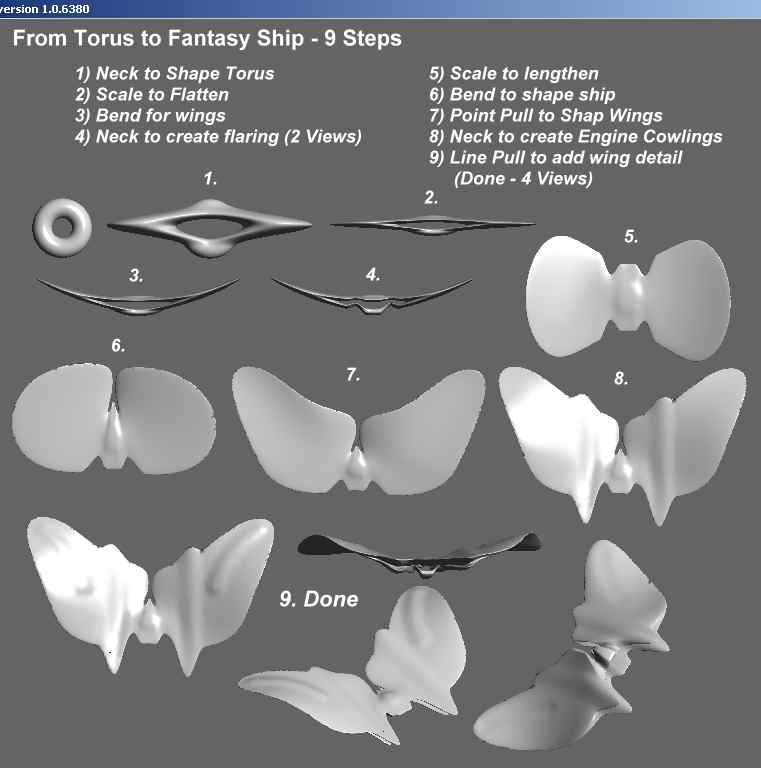
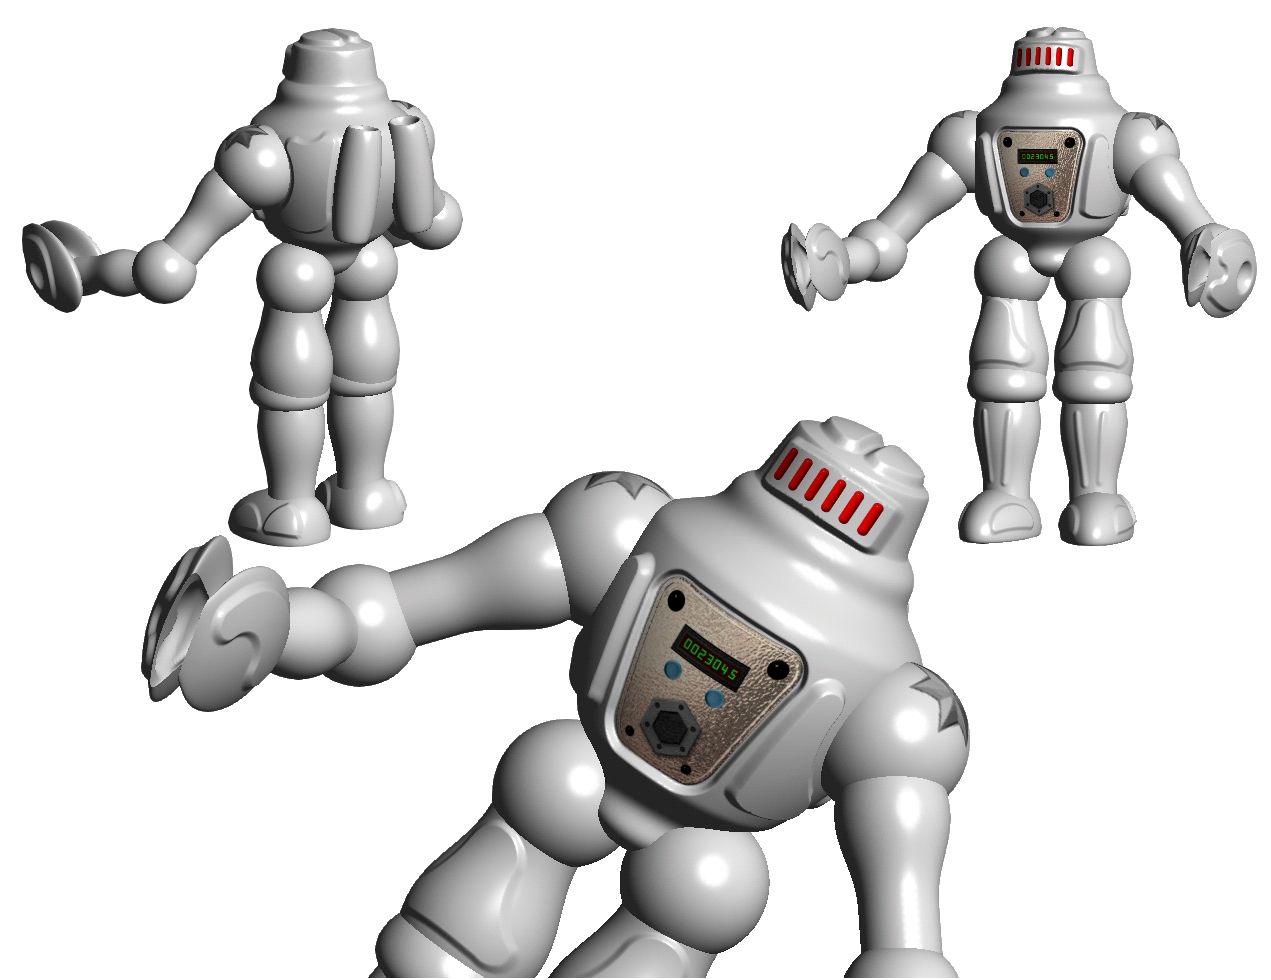
Cosmic Blobs and CB Model Pro users might be among the first to benefit by 3D printing. Check out the CosmicModelz site!

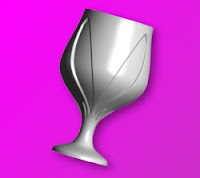
I want one!!! In fact, I've already created the CB Model Pro object that I'd like to run as my first test. It's the chalice in the above image. There are a number of purposely created cuts and, while you can't see it in the image, it's got a hollow center. It's not a solid object. And, the base is also slightly hollowed underneath. If and when I have it made, I'll post it here. I might wait until the servicde bureau gets in their expected Z450.

UPDATE

When sculpting in clay, certain things can only be done completely by hand, since undercuts prevent casting. I've tried to simulate this situation in these two CB Model Pro models that I plan to have printed using a 3D printer. In this sample, the problem is that the horizontal bands bend downward. This would make it difficult to use a mold, since the mold would become trapped by the shape, itself. It's simple task for a 3D printer. However, I have learned that I really need to make the bands thinner, to lower the cost of printing.


The next sample demonstrates a particularly difficult problem for a clay sculpture. It seems to consist of two individual pieces. The first is a shaft, closed on both ends and the second is a spool-like form that freely rotates and slips up and down on the shaft. To do this in clay one would probably choose to glue the top cap into the shaft after it was fired since the pieces might actually fuse during firing.

However, a powder based 3D printer can easily recreate it as a single print job. Loose powder between the shaft and spool would support the spool as it was being built.


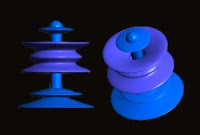
Note that a slight gap exists in the model between the shaft and the hole in the spool. It's going to be interesting to see how this turns out.

I plan to keep track of both of the new low cost printers and will update information as it's available.

Tuesday, May 8, 2007

How I learn CB Model Pro

Thomas Haak, a CB Model Pro user from Germany asks how much time I spend in Cosmic Blobs and CB Model Pro. The answer is that I don't really know. Most of my time in the products is spent as diversionary time, much as people play FreeCell or Solitaire.

I learn by taking a few minutes several times a day... mostly while other processes are running in the background. In these mini-sessions I have absolutely nothing in mind except for experimentation with free form, abstract sculpting. I've saved a short session in hopes that it gives others some ideas for simply playing around in CB Model Pro to learn the behaviour of combinations of tools and shapes.

Play the Free-Form Mini-Session

As you can see, when exploring the capabilities of Cosmic Blobs or CB Model Pro, sometimes it's fun NOT to have any goal other than forming itself.

Monday, May 7, 2007

CB Model Pro - Cubes Aren't Just for Squares!

Some shapes are more difficult than others to visualize creative outcomes. The cube is one of those shapes for me. But, that doesn't mean it can't be done. For instance, in this project we create a table and part of a chair completely from cubes. Moreover, most of the edges end up not being parallel!

We use the Neck, Bend and Scale tools to manipulate our cubes.

Play the Tutorial for the Cubes to Table Project

In the interest of time we simply demonstrated part of a chair back. It's late and I'm lazy. But, the good news is that if you are using CB Model Pro, you've already proven that you're smart enough to figure out how to finish that chair.

Thursday, May 3, 2007

CB Model Pro - Cones Shed Some Light

OK. It was a bad joke. But, I couldn't help myself. So, I'll just keep on going and say that in this mini-project tutorial we'll shed some light on creating a lamp using only the basic cone blob.

Play the Tutorial for the Cones to Lamp Project

The Bend Tool, the Neck Tool and the Flatten Tool play prominent parts in helping us to form a desk lamp. It's not exciting; but, it does show three distinctly different outcomes for three different cones. And, it shows how we move the fulcrum of the bend tool to specify the primary bend point along our object.

CB Model Pro Project - From Cylinder to Invading Armada

Among the basic 'blobs' in CB Model Pro, the cylinder might appear to be the most bland. It's difficult to visualize just how versatile it can be when all the CB Model Pro tools are applied to it. How could one be expected to guess that the unexciting and static cylinder would be used by marauding aliens to create this sweeping attack armada???

OH, The Humanity!!!!

Play the Tutorial for the Cylinder to Invading Armada Project

All the tools are used in this short tutorial. But, the Neck and Bend tools are the real keys used in shaping the model in this particular transformation of the cylinder. They are equally wonderful tools to use when experimenting with creating beautiful flowing sculptural shapes.

Monday, April 30, 2007

CB Model Pro Project - From Sphere to Helmet

We begin a series of specific projects in CB Model Pro by using a Sphere Blob to create a typical science fiction helmet.

Play the Tutorial for the Sphere to Helmet Project

One of the CB Model Pro concepts that plays an important part in this project is that of Nested Blobs where a blob INSIDE another blob is seen using REVEAL techniques.

The entire project took just under 10 minutes to complete.

Wednesday, April 25, 2007

CB Model Pro - User Interface Tutorials


CB Model Pro is a totally unique 3D modeling application. In these tutorials we introduce you to the tools that we use to create our models.

The first of these tutorials will introduce the CONTROLS on the left side of the CB Model Pro screen that let you modify the working environment. These include SAVING your creations, using UNDO and REDO, the MIRROR function and the ORIENTATION tools like MOVE and ROTATE.

Play Interface Tutorial #1 - Environment Controls

In the second tutorial we introduce the TOOLS that we use to manipulate the surfaces of our 3D Models. The unique methodology used in CB Model Pro is to modify the surface of an exisitng 'blob' to create a new 3D model. To accomplish this task, the designers have given us some powerful tools. We'll introduce each of these tools in this tutorial.

Play Interface Tutorial #2 - Modeling Tools

While we address each control or tool only briefly, we hope that it gives you some immediate insight into why we feel this is such an easy, unique and remarkable tool for 3D modeling.

Friday, February 23, 2007

The Snowman With Trees Time Test


I recently submitted a reference to CB Model Pro to a well known blog site. In a comment response someone declared that 'one need only look at' and proceeded to mention a different 3D Modeling program. I had no issues with providing people a different option. But, the needs, skills and sensibilities of humans can be so radically different that I did have issues with the word "Only". It's far too restrictive and more than a little bit naive.

Going to the site he suggested, I was impressed that it was just another 3D Modeling program with a relatively complex interface. While you can certainly learn it, I seriously doubt that one could learn it as quickly as one can learn to shine in CB Model Pro.

However, one of the links in their beginners tutorial pages struck me as not only well done; but, described a task that would be a reasonable test of CB Model Pro's interface. So, I decided to see how long it would take me, a user for less than two months, to accomplish the task they described in CB Model Pro. Furthermore, whatever the result, I would capture the process and post it up here.

The task was to create a snowman and some trees. I have NO idea how long it might take in the other application; but, in CB Model Pro it took well under 10 minutes. And, in the CB Model Pro test, each tree was a bit different.

Here is the link to the video:

Snowman with Trees Time Test

Here is the link to the tutorial for the other 3D modeling program. It might be useful to compare the relative complexity of the processes.

Original Snowman Tutorial

The still picture at the beginning of this post was finished in PhotoImpact for, as of now at least, one cannot bring a background into CB Model Pro.

Thursday, February 22, 2007

CB Model Pro Tutorial Movies

We've talked about how easy it is to use, and learn, CB Model Pro. But, the proof is in the seeing. So, we've created some tutorials, using real-time screen captures, so that you can see for yourself just how easy it is to work in CB Model Pro. Each of the 6 basic blob shapes are covered in this series of tutorials. Tutorial #4 uses several basic blob shapes to create a flower knick-knack that could be rendered on a 3D printer.

Tutorial #1 - Basic Blob Shapes (Sphere & Cylinder)
Tutorial #2 - Basic Blob Shapes (Cone, Cube & Sheet)
Tutorial #3 - Basic Blob Shapes (Torus)
Tutorial #4 - Combining Blob Shapes

Using CB Model Pro to Prototype Ceramic Designs

We found CB Model Pro while looking for 3D modeling programs suitable for designing abstract sculptures. Mudbox 3D is great for designing highly detailed models. But, when it comes to prototyping simpler ceramic objects, nothing can beat CB Model Pro for speed.

It's so easy to experiment with multiple shapes and approaches. And, the ability to rotate the image easily, from all angles, means that all aspects of the design can be evaluated before implementing in clay.

Here is a rather simple design that shows how remarkably the 3D model created in CB Model Pro actually looks like a fired and glazed ceramic vessel! While this model is a nuetral color, we can experiment with any color we'd like to see with a single mouse click.

From Torus to Fantasy Aircraft in 9 steps

There are 6 basic blobs that are the beginning point of your 3D Model in CB Model Pro. They are Sphere, Cylinder, Cone, Cube, Sheet and Torus. The Torus resembles a donut and at first, one wonders just what you can do with it. But, it doesn't take long before you discover that it is one of the most versatile shapes in the CB Model Pro arsenal.

Here is an image that shows how few steps it takes to go from a basic Torus to a fairly complex fantasy aircraft. None of these models took more than 25 minutes to complete. Much of the time was taken by deciding on the next design move... not the actual implementation.


Here are some other samples of aircraft created from a Torus basic blob.


CB Model Pro's 3D Environment

One of the nice things about using CB Model Pro is that it allows you to create multiple models ('blobs') in the design area... which is itself a 3D world. The following image demonstrates using several different blobs to create a composite 3D Model.

The tire is composed of two blobs, the tire and the rim. The character is composed of seven blobs. They are the head, upper torso, lower torso, eyes (2), shoes (2). Many 3D modeling programs limit you to one model per design screen.

This model was created in a little under two hours, most of which was pondering the next design decision.... "Should the rim have spokes or not..." etc. CB Model Pro, with its unlimited UNDO and REDO allows for a lot of experimentation in your design.

Introducing the CB Model Pro Fans Blog

This blog has been created as a place to share techniques and images created in CB Model Pro. At the time of this writing, CB Model Pro is in beta and available as a free download for the beta period.

CB Model Pro a 3D Modeling application from one of the world's premiere CAD companies, Solidworks. The thing that sets CB Model Pro apart from all other 3D modeling applications is a user interface that is less 'techie' and far easier to learn for those new to 3D modeling.

It's also faster to create 3D models with CB Model Pro. You will see this in a series of demos, done in real time that will be linked on this blog. We also have a companion site focusing on the children's version of this software called Cosmic Blobs. Most of the tutorials on the Blobfans Blog also apply to CB Model Pro.

Here is an image of some views of a robot created using CB Model Pro that was completed in a little over an hour.

CB Model Pro Robot Sample

CB Model Pro Robot Sample

Your first 3D Models ('blobs') won't go quite so quickly; but, we've only been using CB Model Pro for a little over 1 month so it won't be long before you, too, can create equally complex models in CB Model Pro.

You can download the beta at http://www.cbmodelpro.com. Be sure to log onto the forums to share your experiences with other CB Model Pro beta users.